

¿Cómo Debería Ser tu Rutina de Higiene Bucal?
Lorenzana & Dental Associates • March 6, 2019
Probablemente has escuchado en muchas ocasiones que debes tener buenos hábitos de higiene para asegurar una boca y dientes saludables. La pregunta es: ¿En qué consisten esos hábitos? Aquí te damos una explicación detallada pero simple de lo que deberías hacer:
Cepillarte los Dientes:
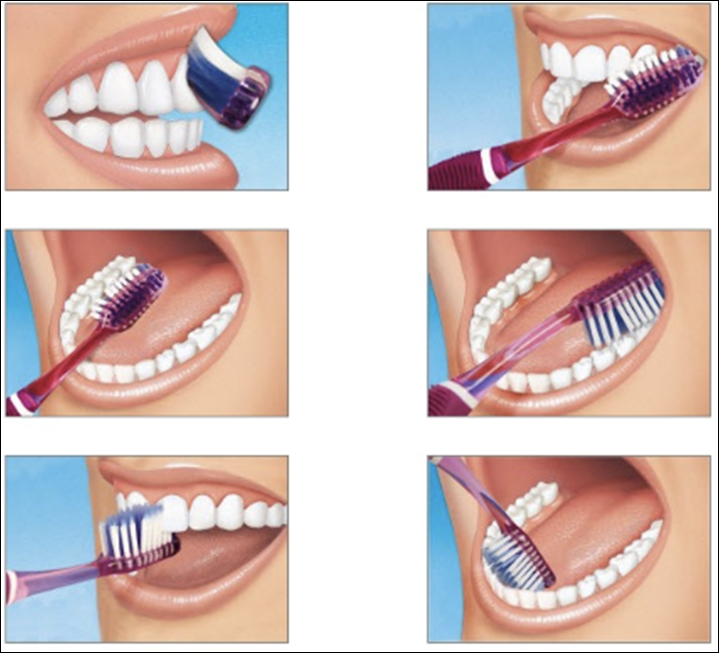
- Escoge un cepillo que se sienta cómodo en tu mano y en tu boca. Usualmente es recomendable utilizar un cepillo con cerdas suaves. Si tu cepillo lastima tus encías o vuelve tus dientes más sensibles, puede ser que sus cerdas estén muy duras.
- Cepíllate al menos dos veces al día durante al menos 2 minutos por sesión.
- Sostén tu cepillo en un ángulo de 45 grados apuntando hacia tus encías.
- Mueve el cepillo de arriba hacia abajo suavemente y cepilla todas las superficies de tus dientes (los costados y la superficie de masticación).
- No olvides también cepillar tu lengua con movimientos circulares.
- Enjuágate con suficiente agua.
- Reemplaza tu cepillo de dientes cada tres meses o antes si las cerdas están desgastadas.
Usa Hilo Dental:
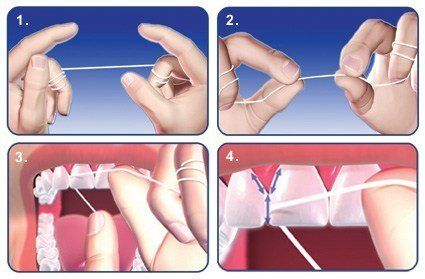
- Usa hilo dental una vez al día, eliminando los restos de comida de entre los sitios que tu cepillo dental no alcanza a limpiar
- Utiliza suficiente hilo dental (unos 45 cm). Enrolla los extremos en tus dedos y, suavemente, introduce el hilo entre tus dientes. Al pasar de un diente a otro, enrolla la parte del hilo que ya utilizaste en un dedo y continúa el proceso con una porción limpia.
- Con el hilo, sigue la curva de tus dientes para evitar lastimar tus encías.
Usa Enjuague Bucal:
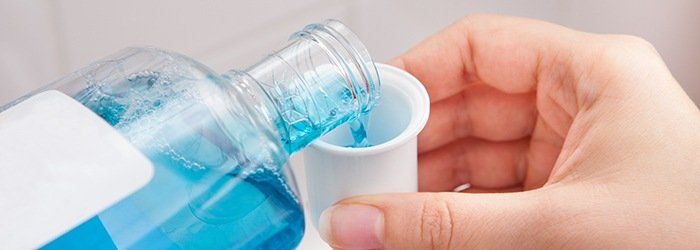
- Usa enjuague bucal a diario después de que te hayas cepillado y hayas limpiado entre tus dientes con hilo dental. Esto te ayudará a limpiar aquellas partes que no hayan sido alcanzadas por el cepillo y el hilo.
- Toma una pequeña cantidad de líquido y enjuaga tu boca durante 30-40 segundos antes de escupirlo.
Una rutina saludable de higiene oral que tome estas cosas en cuenta te ayudará a prevenir o controlar las caries, reducir la placa (una capa de bacterias que se forma en la superficie de tus dientes), prevenir el sarro (placa endurecida), prevenir o reducir la gingivitis (enfermedad de las encías en etapa temprana), refrescar tu aliento, etc. Además, podría ahorrarte mucho dinero que tendrías que gastar si no cuidas bien tu salud bucal y terminas necesitando mucho tratamiento.
Hay algo más que no debes olvidar: Visita al dentista al menos dos veces al año para limpiezas y evaluaciones de rutina. Así puedes darte cuenta de cualquier problema que esté presente y evitar complicaciones en el futuro.
FUENTE: American Dental Association
What Should Your Oral Hygiene Routine Look Like?
You have probably heard many times that you should have good hygiene habits to keep a healthy mouth and teeth. The question is: What do such habits look like? Here we give you detailed yet simple explanation of things you should do:
Brushing:
- Choose a toothbrush that feels comfortable in your hand and in your mouth. It is usually recommended to use a toothbrush with softer bristles. If your toothbrush hurts your gums or makes your teeth more sensitive, its bristles are probably too hard.
- Brush at least twice a day for at least 2 minutes each time.
- Hold your brush at a 45 degree angle pointed towards the gums
- Move the brush back and forth gently and brush all the surfaces of your teeth (the sides and the chewing surface on top).
- Do not forget to also brush your tongue in circular motions.
- Rinse thoroughly with water.
- Replace your toothbrush every three months or sooner if the bristles are worn out.
Flossing:
- Floss once a day between your teeth (all of them), removing the debris from the places your toothbrush cannot reach.
- Use enough floss (about 45 cm of it). Wrap each end around your fingers and gently lower it between your teeth. As you move from one tooth to another, take the dirty floss with one finger and unwind the clean floss from the other finger.
- Follow the curve of your teeth to avoid hurting your gums.
Using Mouthwash:
- Rinse your mouth with mouthwash daily after having brushed and flossed your teeth. This will help you clean any parts that were not reached with your toothbrush and floss.
- Sip a small amount of mouthwash and swish it around in your mouth for 30-40 seconds before spitting it out.
A healthy oral hygiene routine that takes these things into consideration will help you prevent or control tooth decay, reduce plaque (a thin film of bacteria that forms on teeth), prevent tartar (hardened plaque), prevent or reduce gingivitis (an early stage of gum disease), freshen breath, and so on. It could even save you a lot of money you would have to spend if you don't take good care of your mouth and end up needing some big dental treatment.
There is one more thing you should not forget: Visit the dentist at least twice a year for professional cleanings and regular check-ups. That way you can know, in a timely manner, if there are any issues regarding your oral health and prevent future complications.
SOURCE: American Dental Association
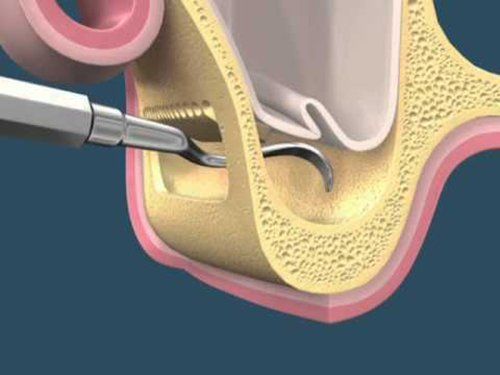
¿Qué Es? El levantamiento de seno maxilar es una cirugía que agrega hueso a tu maxilar superior en el área de tus molares y premolares. El hueso es agregado entre tu maxilar y tus senos maxilares, los cuales se encuentran a cada lado de tu nariz. A modo de hacer espacio para el hueso, la membrana sinusal necesita ser levantada. ¿Para Qué Se Usa? Un levantamiento de seno se realiza cuando no hay suficiente altura en el hueso del maxilar, o cuando los senos están demasiado próximos al maxilar, y los implantes dentales no se pueden colocar por tal motivo. Hay varias posibles razones para que esto suceda: · Muchas personas que han perdido los dientes de su maxilar superior — particularmente los dientes posteriores o molares — no tienen suficiente hueso para que los implantes dentales sean colocados. Una vez se pierde un diente, el hueso en esa área comienza a ser reabsorbido. Si los dientes han estado ausentes por un largo tiempo, con frecuencia no hay suficiente hueso restante para colocar implantes. · Se pudo haber perdido hueso debido a alguna enfermedad periodontal (de las encías). · El seno maxilar puede estar demasiado próximo al maxilar superior. La forma y tamaño del seno varía de persona a persona. El seno también puede agrandarse a medida envejeces. ¿Cómo Se Hace? Tu cirujano hará una incisión y levantará la encía donde tus dientes posteriores solían estar, exponiendo el hueso. Se hace un pequeño agujero ovalado en el hueso. La membrana que reviste el seno en el lado opuesto al agujero separa tu seno de tu maxilar. Esta membrana se empuja suavemente hacia arriba y lejos de tu maxilar. Material de injerto óseo es insertado en el espacio donde el seno solía estar. Una vez el hueso está en su lugar, el tejido es suturado. Lo Que Sigue Después del procedimiento, podrías tener algo de inflamación en el área y podrías sangrar por tu boca o nariz. No te suenes la nariz o estornudes con fuerza. Hacer eso podría causar que el material de injerto óseo se mueva y que los puntos de sutura se aflojen. Puede ser que tu dentista te prescriba medicina para prevenir el congestionamiento y la inflamación. También necesitarás medicina para el dolor, un antibiótico y enjuague bucal antimicrobiano para prevenir una infección. La mayoría de los pacientes solamente experimentarán un poco de incomodidad luego de un procedimiento de levantamiento de seno. Verás al especialista luego de algunos días. Él/ella evaluará el sitio de la cirugía y retirará los puntos de sutura si fuese necesario. Podrías tener que visitar al especialista un par de veces más para que se asegure de que el área está sanando apropiadamente. Tus implantes se colocarán entre cuatro y nueve meses después del levantamiento de seno, dependiendo de la cantidad de hueso requerida. Esto permite que haya tiempo para que el material de injerto óseo se una a tu hueso.
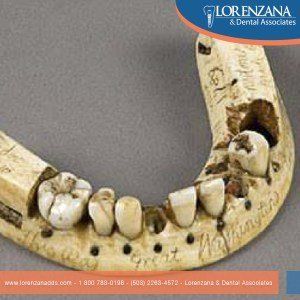
Hoy en día la prótesis dental nos permite reemplazar los dientes perdidos con un aspecto muy estético y natural, devolviendo a la boca la función perdida; pero eso no fue siempre así. Las primeras prótesis dentales de las que tenemos constancia provienen de los etruscos del siglo VIII a. C. y se conserva en el Museo de la Facultad de Odontología de París. Los etruscos utilizaron dientes de animales para reemplazar las piezas faltantes ensambladas sobre bandas de oro, lo cual muestra habilidades muy altas por parte de ellos. Creemos que los fenicios ya usaron oro blando y alambre de oro para la construcción de prótesis dentales. También utilizaron soldaduras y modelos de impresiones. Hacia 754 aC , los etruscos, hábiles artesanos de la época, producían pónticos muy complejos. Empleaban bandas de oro soldadas cada una por pónticos hechos con diferentes piezas dentales de humanos o animales.

Aprende un poco sobre la increíble historia de la higiene dental.
Learn a little about the incredible history of dental hygiene.
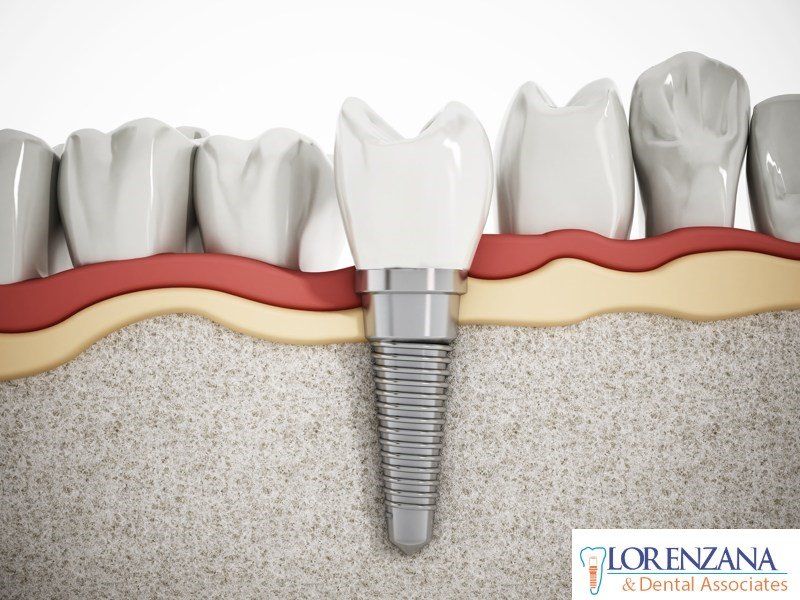
Aprende un poco sobre la increíble historia de los implantes dentales.
Learn a little about the incredible history of dental implants.

We answer some of the most common questions about dental implants
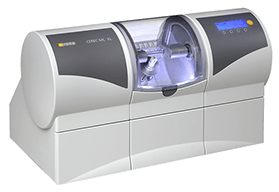
CEREC is an innovative system that allows for one-visit dental restorations that are functional and esthetic.
CEREC es un sistema innovador que hace posible brindar a los pacientes restauraciones dentales en un solo día, con resultados funcionales y estéticos.

Learn about the differences between CEREC and traditional techniques to fabricate dental restorations
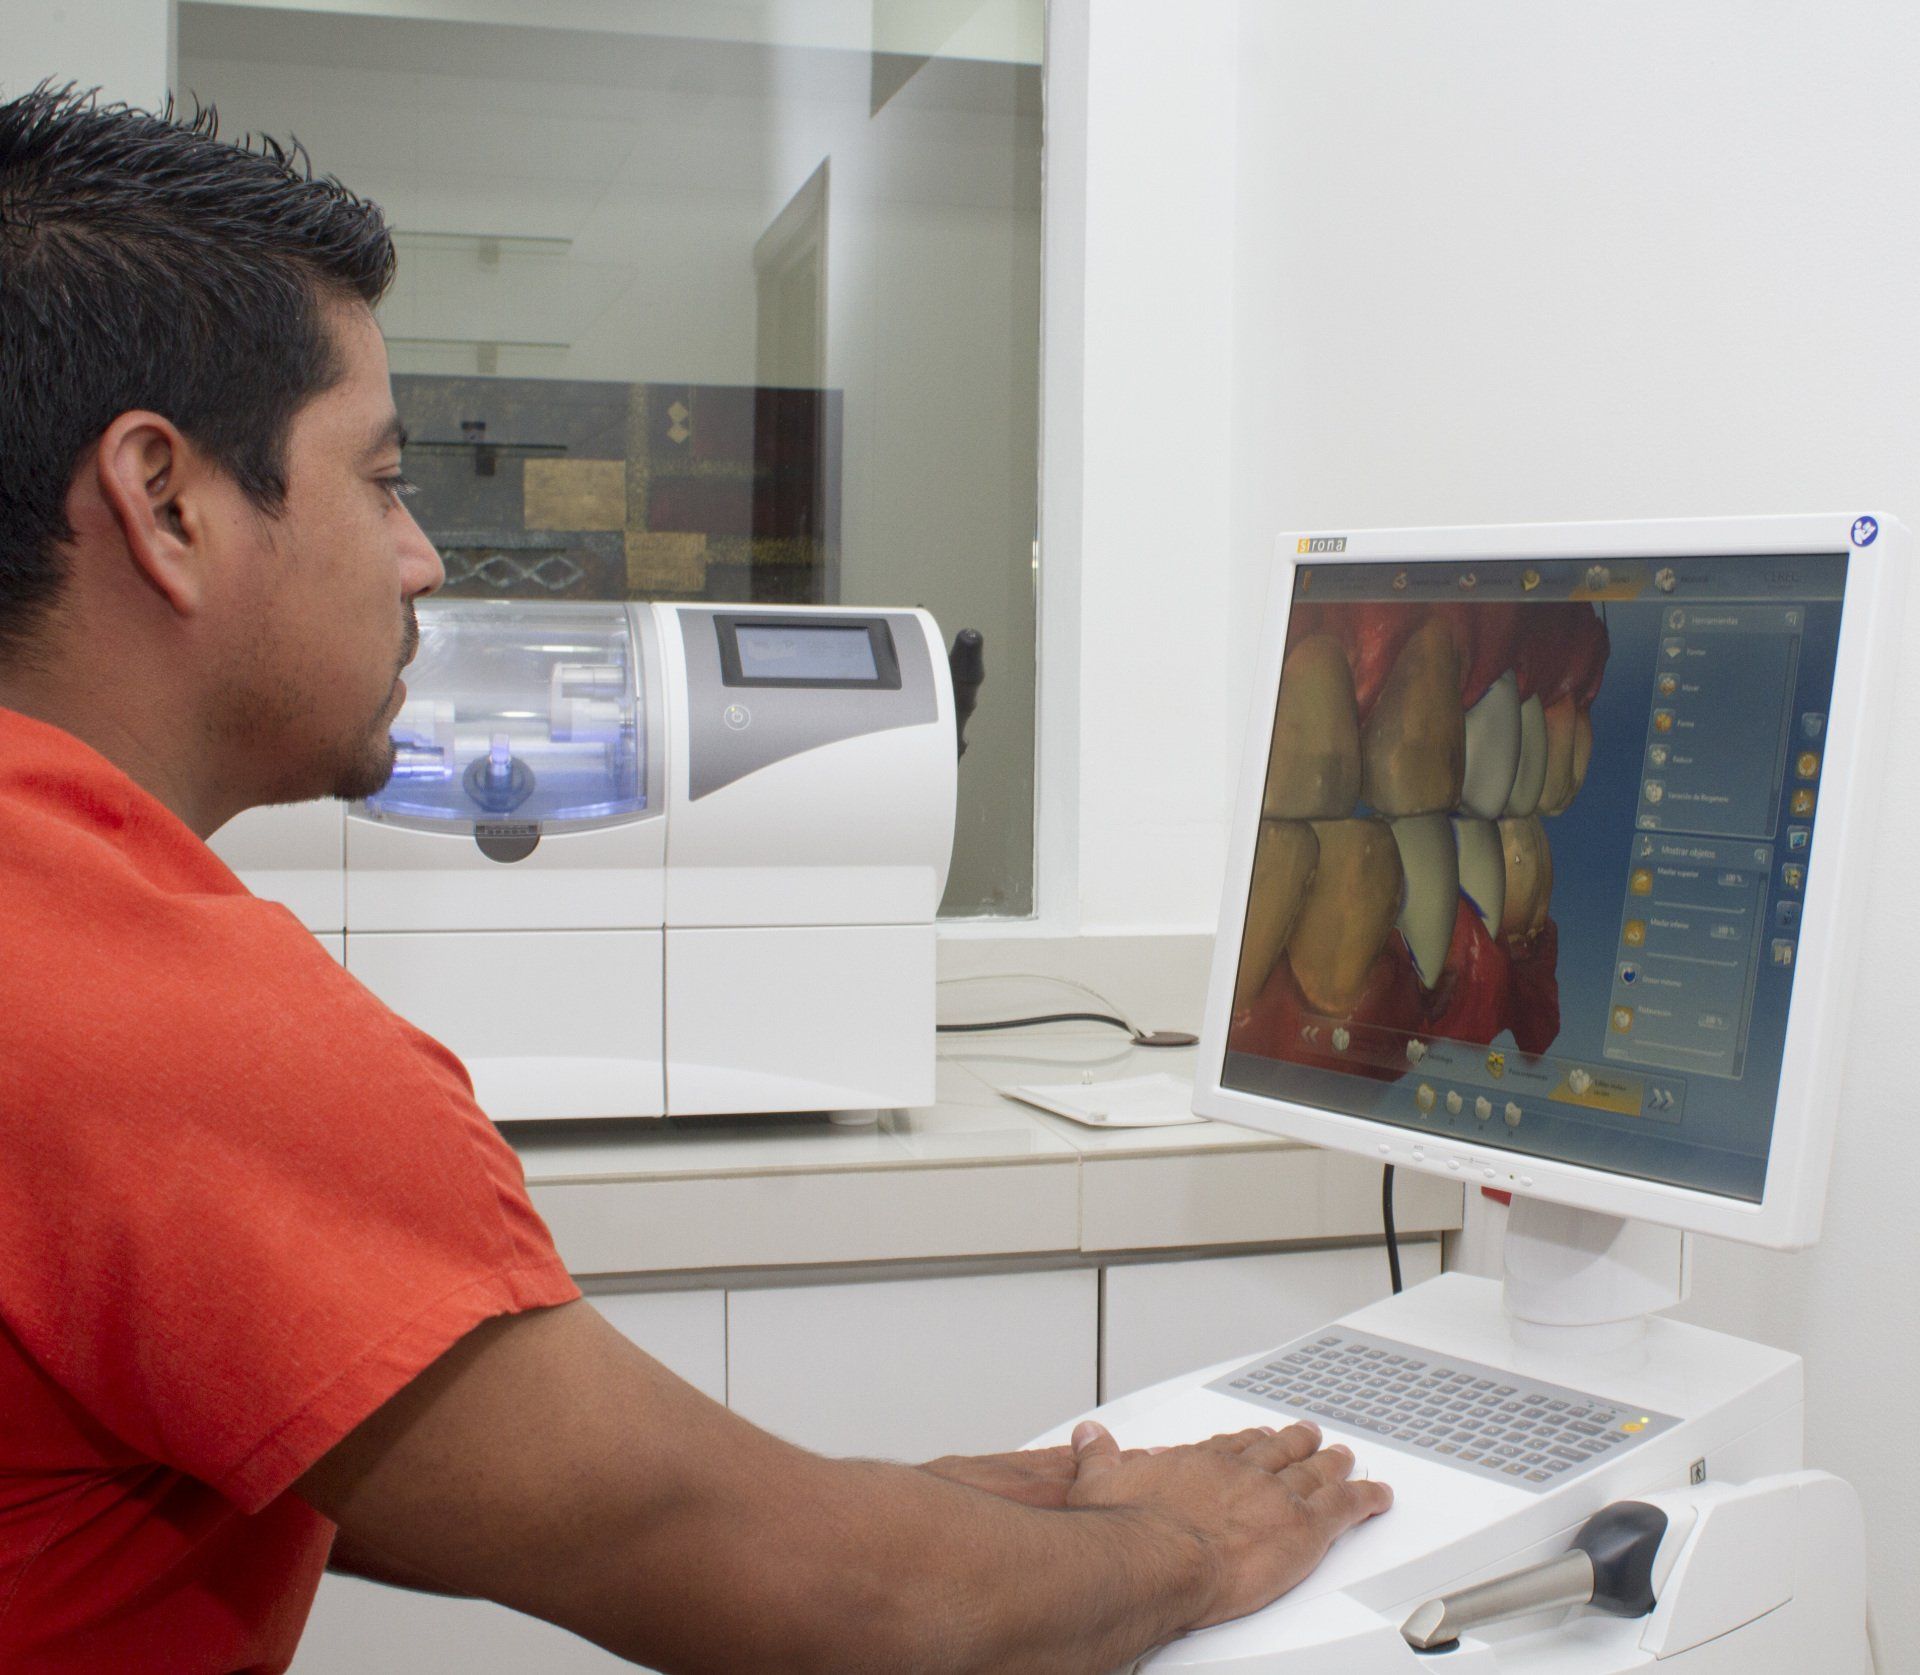
At Lorenzana & Dental Associates, we love our CEREC system - and our patients love it, too! Thanks to CEREC, we can give people the convenience of getting their teeth fixed (e.g. crowns, veneers) in as little as a single visit to our clinic. That is just impressive, right? But how did such an incredible technology as CEREC come into existence? Well, we will talk a little about that in this blog, which is the first in a series of blogs about this system. Let's get to it!
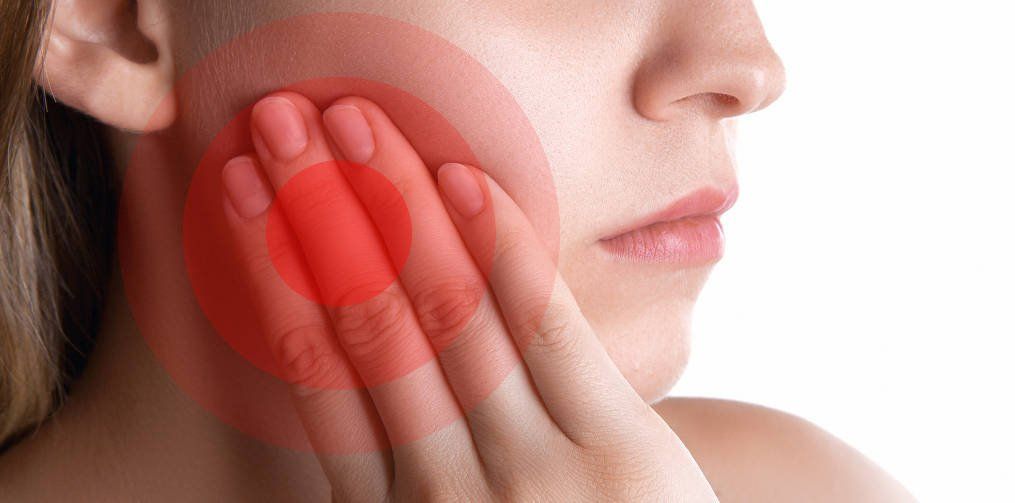
Temporomandibular joint disorders are conditions that cause discomfort and inhibit the proper functioning of the jaw joint and muscles that control jaw movement. Causes In most cases, the cause of TMJ disorders is not evident. However, here is a list of potential causes: External trauma, such as a hard hit to the head or jaw. Tooth grinding or jaw clenching. Poor alignment between top and bottom teeth. Excessive chewing (e.g. gum or fingernails). Overextending the TMJ while eating large things. Degenerative diseases. Symptoms There are various symptoms that could be related to TMJ disorders. Examples of these are the following: Pain in facial, jaw, neck or back muscles. Swelling. Muscle stiffness or limited movement of the jaw. Clicking, popping or grating sounds accompanied by pain when moving the jaw. Teeth not fitting comfortably together. Jaw not opening uniformly or locking. Headache or earache. Difficulty swallowing. Diagnosis There is not always a straightforward way of diagnosing TMJ disorders. Exact causes and symptoms are not clear, and that means the discomfort someone is experimenting could be due to different health issues. Your doctor will take your symptoms and medical history into consideration and then will examine areas of discomfort, including the head, neck, face, and jaw. The doctor might also use x-rays in the analysis of your case. Treatment Reversible Treatments Conservative treatments do not invade the tissues of the face, jaw, or joint, or involve surgery. Reversible treatments do not cause permanent changes in the structure or position of the jaw or teeth. It is advisable that you try these first, before considering more expensive and permanent ones. Muscle and ligament tightness can be helped with jaw stretching and relaxing exercises as advised by your doctor. If the jaw becomes locked, it may be necessary to manipulate the joint back into place under a general anaesthetic. The most common TMJ issues are temporary and do not get worse. Short-term use of pain relievers, such as ibuprofen, may be sufficient. A stabilization splint or a bite guard may provide relief. Stabilization splints should only be used for a short time and should not cause permanent changes in bite. Permanent Treatments There is often debate around the use of permanent methods to treat TMJ disorders. There are no long term studies that show the efficacy of these methods, plus they are extensive and often more expensive than reversible treatments. The bite may be adjusted by polishing teeth, using reconstructive dentistry, or fitting braces. A repositioning splint may be fitted, which over time will permanently change the position of the jaw, ligaments and muscles. There may be an effect on teeth alignment, so more dental work may be needed to adjust the teeth. There is even the option to replace the jaw joint with artificial implants, but it should be considered a last resort. Self-Care In many cases, self-care measures can help alleviate the symptoms of TMJ disorders: Eating soft foods. Applying cold or warm compresses. Avoiding excessive jaw movements (shouting, gum-chewing, and wide yawning, for instance). Practicing gentle jaw stretching and relaxing exercises. Resting the jaw as much as possible. SOURCES: National Institute of Dental and Craniofacial Research Health Navigator
After a surgery, regardless of its dimensions, it is necessary that patients follow the doctor’s indications in order to recover well and quickly. POST-SURGICAL CARE Patients should rest the day of the surgery and the day after. This is the most delicate period, and is important to avoid complications. Patients need to avoid spitting, speaking, and chewing on the site of surgery. Movements and/or pressure may cause some lesion and extend recovery time. Patients should not smoke. The components in cigarettes increase the probability of complications and infections. 24 hours after surgery, patients can start to gently rinse their mouth. DIET TO FOLLOW The following list details the requisite diet for patients who have just undergone a dental implants surgery: Do NOT drink any alcoholic or carbonated drinks. Maintain a soft diet. Start by eating food that practically melts in your mouth or require minimum chewing effort, such as pudding, ice cream, yogurt, soup (not too hot), jello, and mashed potatoes. Preferably, consume cold food. By all means, avoid crunchy/hard food, such as seeds. After the first 48 hours, patients can slowly start to include more soft, easily-chewable food to their diet.