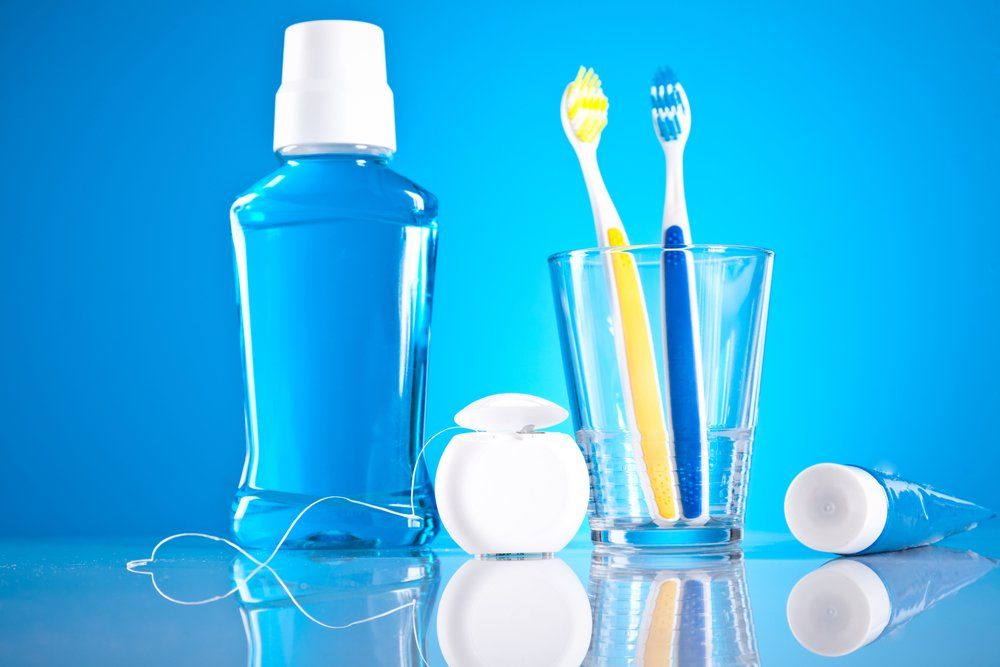
10 Toothbrush Mistakes & How to Fix Them

Admit it -- brushing your teeth is so second nature you barely think about it. But doing it right is a key part of good oral health, and it can help you avoid cavities and gum disease. Brush up on your skills with these easy-to-follow tips.
1. Choose the Right Tool
Do you have the right toothbrush? "If you are straining to open wide enough to let the brush in, the brush is probably too big," . It should feel good in your mouth and hand, so you’ll use it often. Know your bristles. If they're too stiff, they can hurt your gums. The American Dental Association (ADA) recommends a soft brush. Electric toothbrushes can make it easier to do a better job, especially if you have arthritisor other trouble with your hands, arms, or shoulders. “If we see someone having issues with the manual (toothbrush), introducing an electric brush has excellent results,” Sesemann says.
2. Give It Time
Are you brushing enough? Twice a day is recommended. ''Three times a day is best,". You should brush for at least 2 minutes. “Most people fall short of the time period,” he says. He suggests you divide your mouth into four sections and spend 30 seconds on each. Some electric toothbrushes have built-in timers and can even track your use patterns by syncing to your smartphone. To make the time go faster, Sesemann says he watches TV while he brushes. If you go too long, though, plaque will build up and boost your chances of sore gums and other problems, he says.
3. Don’t Overdo It
Brushing more than three times a day might not be ideal, Sesemann says. That's because too much brushing can wear down tooth enamel and damage your gums. Also, “don’t bear down too hard,” he says. “Use a lighter touch.” “With electric brushes, you let the bristles do the work and just guide the toothbrush,” Price says. Be gentle. It doesn’t take a lot of force to remove plaque, he says.
4. Perfect Your Technique
Are you brushing correctly? Wide, side-to-side strokes can cause scrapes along your gum line, Sesemann says. Hold your brush at a 45-degree angle to your gums, and make an up-and-down motion. Use short strokes. Brush outer and inner tooth surfaces, back molars, and your tongue. “Don’t forget about those hard-to-reach areas,” Sesemann says. If you aren’t thorough, plaque has time to sit in your mouth and cause damage.
5. Switch Things Up
Do you always begin brushing in the same place? Dentists say most of us do. "Start in a different place so that you don't get lazy," Price says. By the time you get to the last area of your mouth, you may be bored. Stay aware of what you’re doing. “Keep track of where you are going and where you have been. Make it to all the surfaces,” Sesemann says.
6. Pick Products Wisely
The kind of toothpaste you use matters, he says. The things that brighten or control tartar can be harsh. “An increase in whitening particles can be harmful and sand away tooth structure.” Go back to plain old fluoride toothpaste, he says. If you want to lighten your smile, you can always switch between whitening toothpaste and regular.
7. Control Your Sour Tooth
Energy drinks, diet sodas, and sour candies -- even healthy things like apple juice, orange juice, and coffee -- have acid that can soften tooth enamel, Sesemann says. If you do go for sour goodies, wait half an hour before you brush. That gives your saliva time to restore tooth enamel. “The mechanical action of brushing softened teeth is the perfect recipe for wearing away enamel,” Sesemann says.
8. Keep It Clean
Do you always rinse your brush? You should. Germs from your mouth and teeth can stay on it if you don’t. It will also get rid of leftover toothpaste that can harden bristles. You shouldn’t use a disinfectant to cleanse your toothbrush. Just rinse it and let it air dry. Don't put it in a case where it will stay damp for a long time.
9. Avoid Potty Mouth
Most of us store our brushes in the bathroom -- not the cleanest place in the house. To keep yours tidy, stand it up in a holder. If you leave it on the counter, you could expose it to germs from your toilet or sink. Don’t let brushes touch each other if they’re stored together. Let it air dry a moist brush is more likely to grow bacteria. Use a cover that lets air in when you travel.
10. Let It Go
How old is your toothbrush? The ADA suggests you get a new brush every 3 or 4 months. You can also look at the bristles. "Once the bristles lose their normal flexibility and start to break apart, change your toothbrush," Price says. Frayed or broken bristles won’t clean your teeth as well. If you can’t decide which toothbrush to buy, ask your dentist what kind is best. Source: WebMD By: Lindsey Grant
Reviewed By Michael Friedman, DDS
10 errores de cepillo de dientes y cómo solucionarlos
Admítelo: cepillarse los dientes es tan natural que apenas lo piensas. Pero hacerlo bien es una parte clave de una buena salud oral y puede ayudarlo a evitar caries y enfermedades de las encías. Mejore sus habilidades con estos consejos fáciles de seguir.
1. Elija la herramienta correcta
¿Tienes el cepillo de dientes correcto? "Si está esforzándose por abrir lo suficiente para dejar entrar el pincel, el pincel probablemente sea demasiado grande". Debería sentirse bien en su boca y mano, por lo que lo usará con frecuencia. Conoce tus cerdas. Si son demasiado rígidos, pueden lastimarse las encías. La Asociación Dental Americana (ADA) recomienda un cepillo suave. Los cepillos de dientes eléctricos pueden hacer que sea más fácil hacer un mejor trabajo, especialmente si tiene artritis u otros problemas con las manos, los brazos o los hombros. "Si vemos a alguien teniendo problemas con el manual (cepillo de dientes), la introducción de un cepillo eléctrico tiene excelentes resultados", dice Sesemann.
2. Dale tiempo
¿Estás cepillando lo suficiente? Se recomienda dos veces al día. "Tres veces al día es mejor". Debe cepillarse por lo menos durante 2 minutos. "La mayoría de la gente no alcanza el período de tiempo", dice, y sugiere dividir la boca en cuatro secciones y pasar 30 segundos en cada una. Algunos cepillos de dientes eléctricos tienen temporizadores incorporados e incluso pueden rastrear tus patrones de uso sincronizándolos con tu teléfono inteligente. Para hacer que el tiempo vaya más rápido, Sesemann dice que mira la televisión mientras cepilla. Si vas demasiado tiempo, sin embargo, la placa se acumulará y aumenta tus posibilidades de dolor de encías y otros problemas, dice.
3. No exagere
Cepillarse más de tres veces al día podría no ser ideal, dice Sesemann. Eso es porque demasiado cepillado puede desgastar el esmalte de los dientes y dañar sus encías. Además, "no soportes demasiado", dice. "Use un toque más ligero". "Con cepillos eléctricos, deje que las cerdas hagan el trabajo y simplemente guíe el cepillo de dientes", dice Price. Sé gentil. No se necesita mucha fuerza para eliminar la placa, dice.
4. perfecciona tu técnica
¿Estás cepillando correctamente? Los movimientos anchos de lado a lado pueden causar raspones a lo largo de la línea de las encías, dice Sesemann. Sostenga su pincel en un ángulo de 45 grados con respecto a sus encías, y realice un movimiento hacia arriba y hacia abajo. Use trazos cortos. Cepille las superficies externas e internas de los dientes, los molares y la lengua. "No se olvide de esas áreas difíciles de alcanzar", dice Sesemann. Si no eres completo, la placa tiene tiempo para sentarse en tu boca y causar daño.
5. Cambiar las cosas
¿Siempre comienzas a cepillarte en el mismo lugar? Los dentistas dicen que la mayoría de nosotros sí. "Comience en un lugar diferente para que no se vuelva flojo", dice Price. Para cuando llegas a la última área de tu boca, puedes aburrirte. Manténgase al tanto de lo que está haciendo. "Mantenga un registro de dónde va y dónde ha estado. Acceda a todas las superficies ", dice Sesemann.
6. Elija productos sabiamente
El tipo de pasta de dientes que usa importa, dice. Las cosas que iluminan o controlan el sarro pueden ser duras. "Un aumento en las partículas de blanqueamiento puede ser dañino y ahuyentar la estructura del diente." Regrese a la simple pasta de dientes fluorada, dice. Si desea aligerar su sonrisa, siempre puede cambiar entre pasta de dientes blanqueadora y regular.
7. Controla tu diente agrio
Las bebidas energéticas, los refrescos dietéticos y los caramelos ácidos, incluso los alimentos saludables como el jugo de manzana, el jugo de naranja y el café, tienen un ácido que puede ablandar el esmalte dental, dice Sesemann. Si busca golosinas agrias, espere media hora antes de cepillarse. Eso le da a su saliva tiempo para restaurar el esmalte dental. "La acción mecánica de cepillar los dientes suavizados es la receta perfecta para quitar el esmalte", dice Sesemann.
8. Mantenlo limpio
¿Siempre enjuagas el pincel? Debieras. Los gérmenes de su boca y dientes pueden permanecer en él si no lo hace. También eliminará la pasta de dientes sobrante que puede endurecer las cerdas. No debe usar un desinfectante para limpiar su cepillo de dientes. Solo enjuague y deje que se seque al aire. No lo coloque en un caso donde permanecerá húmedo durante mucho tiempo.
9. Evite la boca insignificante
La mayoría de nosotros guardamos nuestros pinceles en el baño, no es el lugar más limpio de la casa. Para mantener el suyo ordenado, levántelo en un soporte. Si lo deja en el mostrador, puede exponerlo a los gérmenes de su inodoro o lavabo. No permita que los pinceles se toquen entre sí si están almacenados juntos. Dejar que se seque al aire un cepillo húmedo es más probable que crezca bacterias. Use una cubierta que deja entrar el aire cuando viaja.
10. Déjalo ir
¿Qué edad tiene tu cepillo de dientes? La ADA sugiere que obtenga un nuevo cepillo cada 3 o 4 meses. También puedes mirar las cerdas. "Una vez que las cerdas pierden su flexibilidad normal y comienzan a romperse, cambie su cepillo de dientes", dice Price. Las cerdas deshilachadas o rotas tampoco limpiarán tus dientes. Si no puede decidir qué cepillo de dientes comprar, pregúntele a su dentista qué tipo es el mejor. Fuente: WebMD Por: Lindsey Grant
Revisado por Michael Friedman, DDS